

In this tutorial, we will learn how to remove blank rows from the current worksheet to cover the following 3 scenarios:
-
Delete all empty rows
-
Delete empty rows within a specific row range
-
Delete empty rows using the cell address
To use the actions in Excel advanced package, use the following sequence.
-
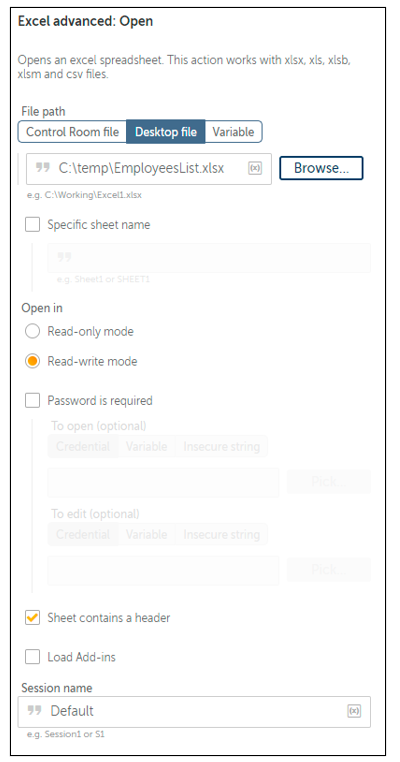
Open the Microsoft Excel spreadsheet that you want to use to automate the Microsoft Excel-related tasks. Use the Open action to open the spreadsheet and select the required input file. Select the checkbox ‘Sheet contains a header’. Header is considered as Row 1 and the data starts from Row 2.
-
-
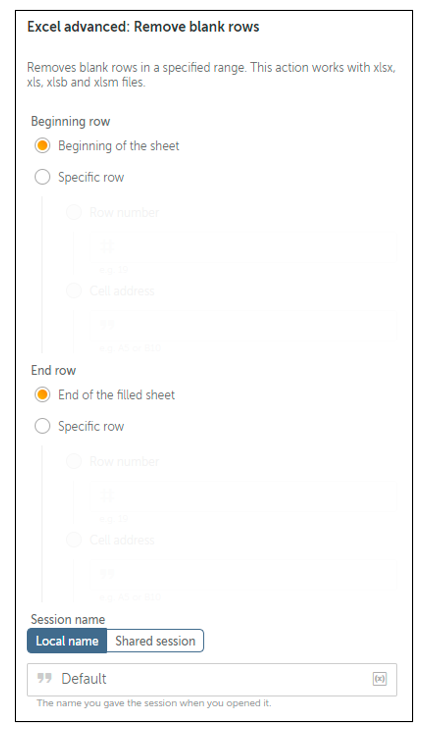
Use ‘Remove blank Rows’, we will discuss about the configurations in the different scenarios below.
-
-
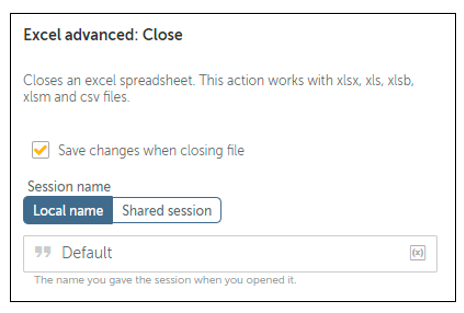
As the last step, close the spreadsheet using the Close action and ensure you check the checkbox 'Save changes when closing file' so that all the changes are saved before closing the spreadsheet
-

You can download the Employees List Excel spreadsheet in the attachments below.
Scenario 1: Delete all empty rows
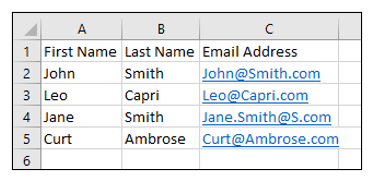
Here is the data setup required to execute this scenario.

In Step 2 - Remove blank rows, configure the properties: Beginning Row → Beginning of the sheet, End Row → End of the filled sheet.
Once you Run the bot, here is the output with all the empty rows removed.
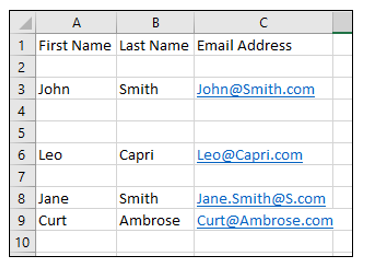
Scenario 2: Delete empty rows within a specific row range. In this scenario, we want to delete the empty rows from Row 2 till Row 5.
>Here is the data setup for this scenario:
Since we only want the empty rows from Row 2 till 5 to be removed. the empty row in the current Row 7 will still remain blank after this bot is executed.
In Step 2 - Remove blank rows, configure the properties: Beginning Row → Specific Row with Row Number as 2, End Row → Specific Row with Row Number as 5.
The row numbers can either be hard-coded or can be added as a Number variable. If you have the row number as a string variable, you either have to perform an implicit conversion within the Row Number field or by using the action ‘String to Number’.

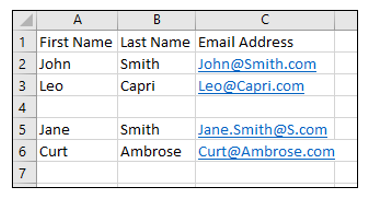
Once you Run the bot, here is the output with the empty rows removed from Row 2 till 5 and the empty row between the rows with first name as Leo and Jane is still present.
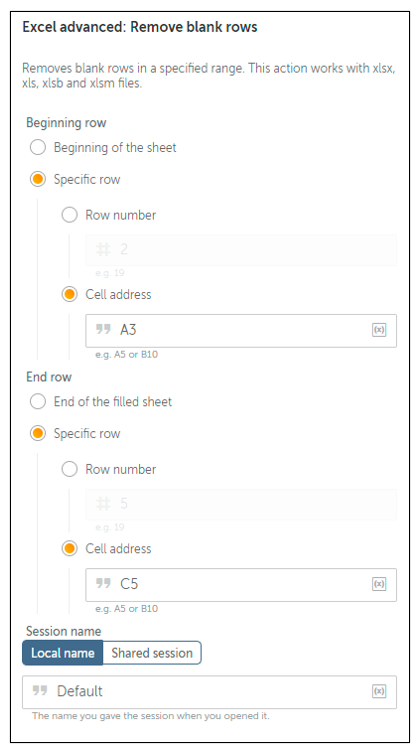
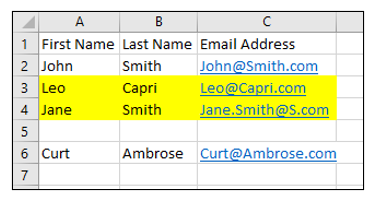
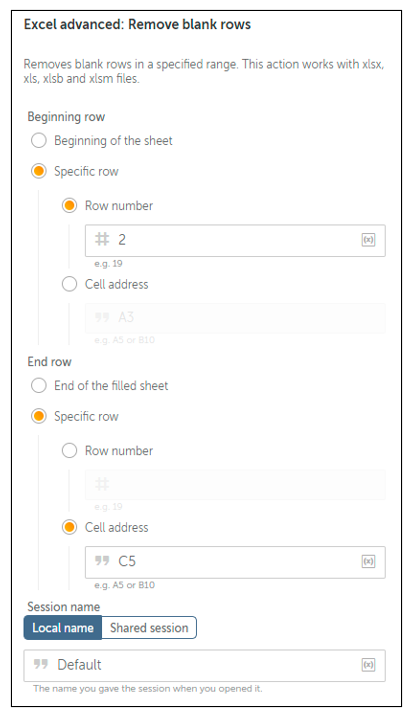
Scenario 3: Delete empty rows using the cell address. In this scenario, let's remove the empty rows between the Cell Address range A3 till C5.
Here is the data setup for this scenario:
Since we only want to remove the empty rows between the Cell Address range A3 till C5, the empty row in the current Row 6 will still remain blank after this bot is executed.
In Step 2 - Remove blank rows, configure the properties: Beginning Row → Specific Row with Cell Address as A3, End Row → Specific Row with Cell Address as C5.
Once you Run the bot, here is the output with the empty rows removed from Cell Address range A3 till C5 and the empty row between the rows with first name as Jane and Curt is still present.
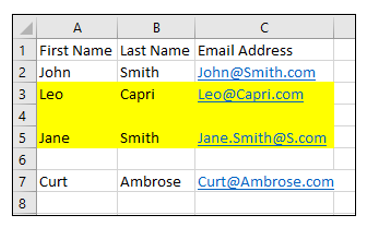
You can also use a combination of Row Number and Cell Address in the Beginning and End Row as required by your specific use case as shown below.
You can download the bot from the attachments below to try out these scenarios.
This concludes the tutorial.
Packages used in this tutorial:
Conclusion:
‘Remove Blank Rows’ action can be used to remove empty rows in the entire worksheet, or within the selected row numbers, or even using the specific cell address range.
To learn how to use other actions in the Excel Advanced package and build a Profit Calculation bot, please visit this page.